Solar panel install on our RV
We're between coming off a J-O-B in Seattle and hitting the road.
We figured it's probably a good idea to take the time to make some upgrades on PB.
Solar power was a big part of our energy plan on our sailboat down in the Sea of Cortez, so it only makes sense we take advantage of the affordable ways solar systems provide electricity. Once I did the math and saw how little it cost to buy all the parts we needed, it was a no-brainer. Having dealt with, troubleshooted, installed, and maintained these types of systems at sea, we already had the tools and knowledge to do the work ourselves. Your mileage may vary if you've never done this before. I'd at least suggest enlisting the help of a friend who has if you're feeling like taking on the install yourself.
The solar equipment:
We got every item we needed from Amazon, delivered to our doorstep. Some things arrived the same day we ordered them (no trips to the store)! When all tallied, we couldn't believe that the ENTIRE SYSTEM WAS UNDER $1,000. Make that $927 to be more precise. And we have extra cable and connectors left over as spares!
4 x HQST 100W Monocrystalline Solar Panels
1 x Victron Energy SmartSolar MPPT Controller 100V | 50 Amp (has Bluetooth built in, so we didn't have to buy extra parts to monitor solar status...it's all viewed on our phone!)
4 x HQST z-Mounting Bracket Sets
4 x MC4 Solar Branch Connectors
1 x Dicor Lap Sealant Tube 10oz
1 x 30-foot Roll of Butyl Putty Tape
2 x 3-foot MC4 Connector 10GA Extension Cables (1 red + 1 black)
2 x 5-foot MC4 Connector 10GA Extension Cables (1 red + 1 black)
2 x 10-foot MC4 Connector 10GA Cables (1 red + 1 black)
2 x 20-foot MC4 Connector 10GA Extension Cables (1 red + 1 black)
1 x MC4 Crimp/Connector Tool (ended up not needing this, but will be handy to have around if we want to make our own MC4 wire)
2 x 15-feet Flexible Copper Battery Cable 6GA (1 red + 1 black)
10 x Copper 6GA Battery Ring Connectors (only needed 2, but these are always handy to have)
The solar install:
We didn't get all of the parts at once. The major components were ordered first; just about everything but wire and some connectors. We wanted to lay everything out and be sure where it was going before ordering the cable lengths we needed.
Before installing anything:
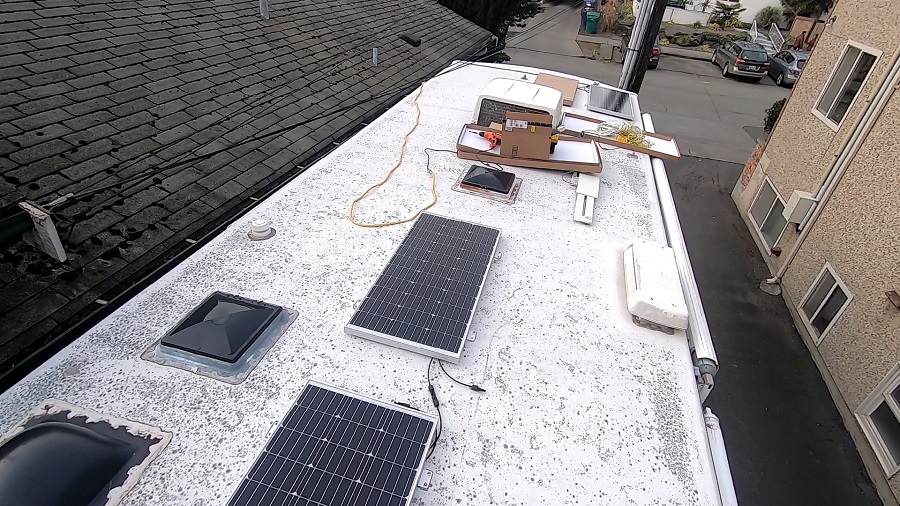
We set up everything closer to the ground in the back of our truck bed to test each panel independently and then in series/parallel with a test meter to make sure all the components worked. Even sat the controller in the battery compartment of the RV and wired it up to test every part of the system. Once we knew everything worked, it was all moved to the roof of the motorhome.
Putting holes in our roof:
The scariest part of installing ANYTHING on the roof of an RV is the fact we'll be drilling holes into the only thing keeping the rain and other weather out of our home.
The EPDM roofing on PB is showing it's age and needs to be replaced soon. But we're definitely not doing that here in Seattle...it could rain at any time! That job is being planned for a future date when we can replace the entire roof covering under the protection of covered storage.
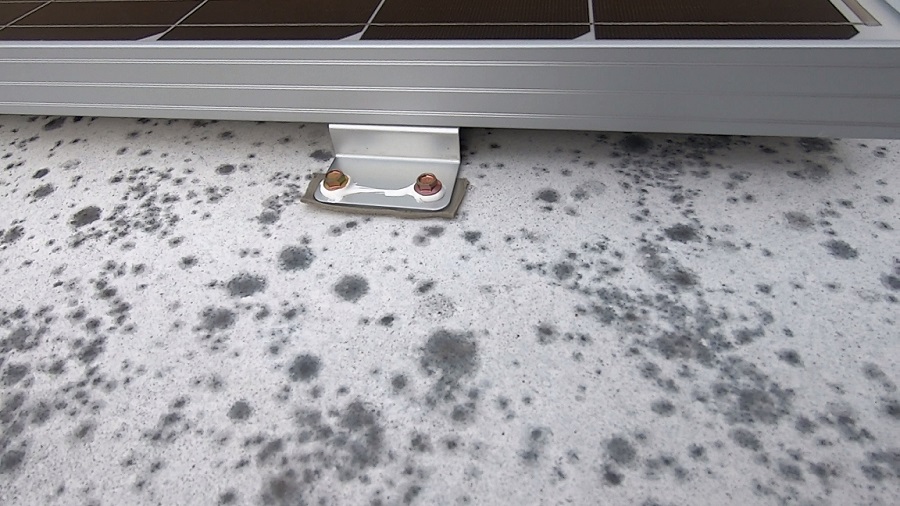
The z-brackets came with self-tapping screws that were 2" long. We'd place a strip of butyl putty tape between the bracket and the roof, dab on the Dicor lap sealant where the crew goes through the bracket and run the screw through slowly. There was one screw where I think we didn't get a really great bite, but every other one of the 32 screws tightened up, queezing butyl sealant out from under the bracket...exactly what we want.
Wiring it up:
The panels are wired in series/parallel. Each group of two panels are wired in series, creating 24v sections from two 12v panels. Then each pair is wired in parallel to increase the amperage for each pair added. Going up to 24v instead of staying at 12v will give us less voltage drop over the longer runs, and increase the panels we can use before we reach either the maximum amperage or voltage ratings for the Victron Solar Controller. We can add more 100W pairs later and installed the current panels in locations that would give us the space to do exactly this if we want to later without moving any part of the current installation.
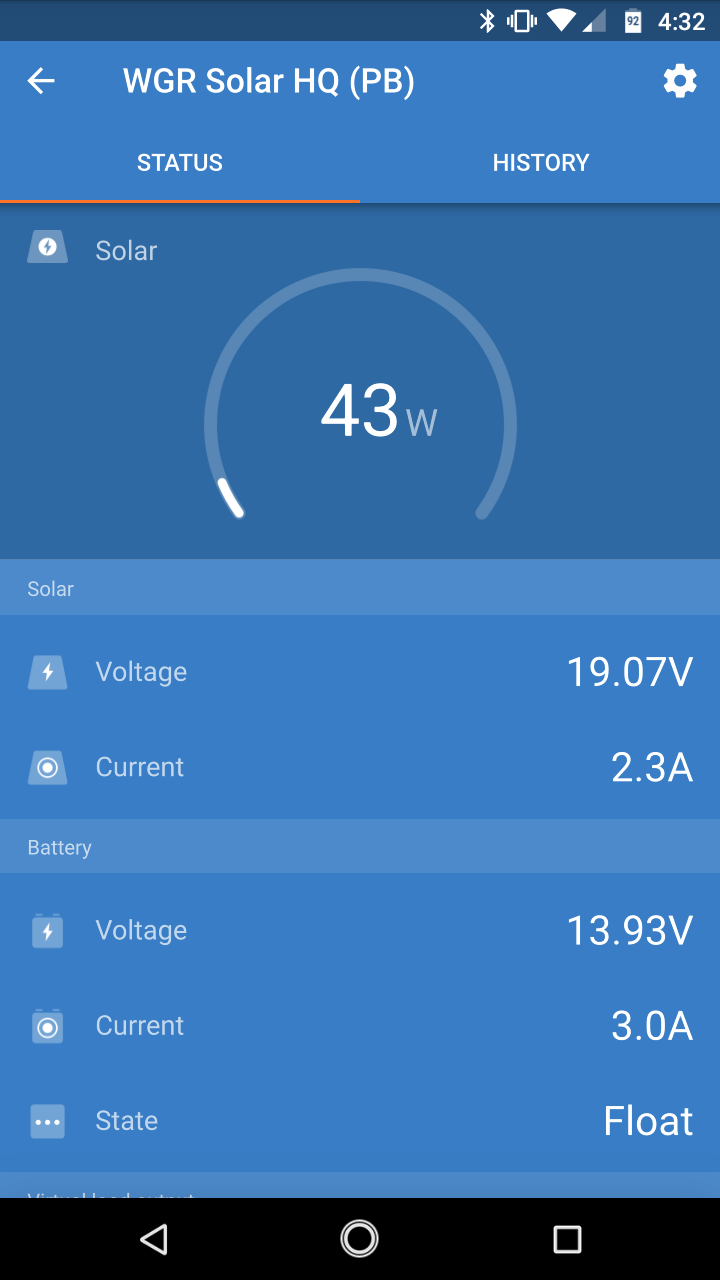
The MPPT Solar Controller:
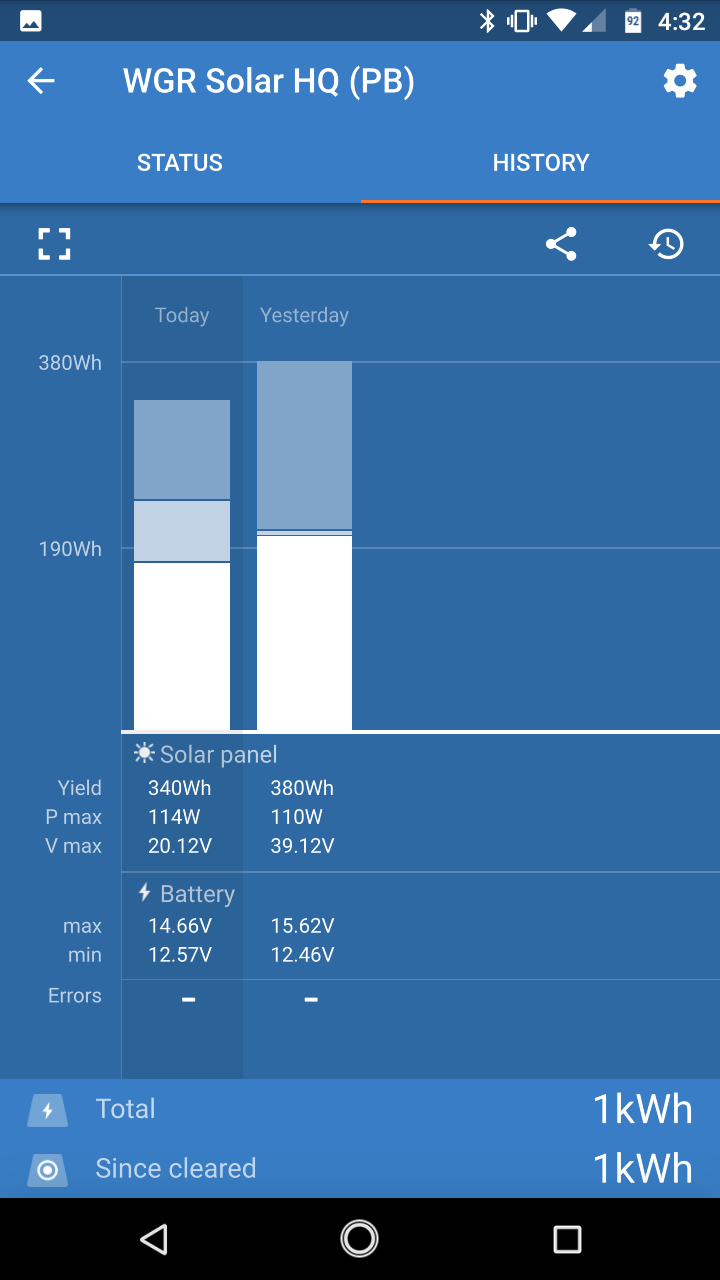
This particular controller has Bluetooth enabled out of the box. While we would normally need to buy and install a separate display unit to see any specs on the solar controller (watts, voltage, amps, errors, etc.) we don't have to do that here. The app on our phone shows us exactly what's going on with the system. It's a little finnicky (especially when firmware upgrades need to happen) but if we're close in or next to the RV, we can see what is going on within seconds. It even tracks the solar history and allows us to change the settings of the controller for equlization stages, etc.